

Use a computer, not your phone. The Facebook app hides most of these screens. Have your personal Facebook login, plus the business ID of whoever you are giving access to.
Find your account
You just came on board, so the first job is getting us access to your Page and ads. Find it, then share it. A few minutes.
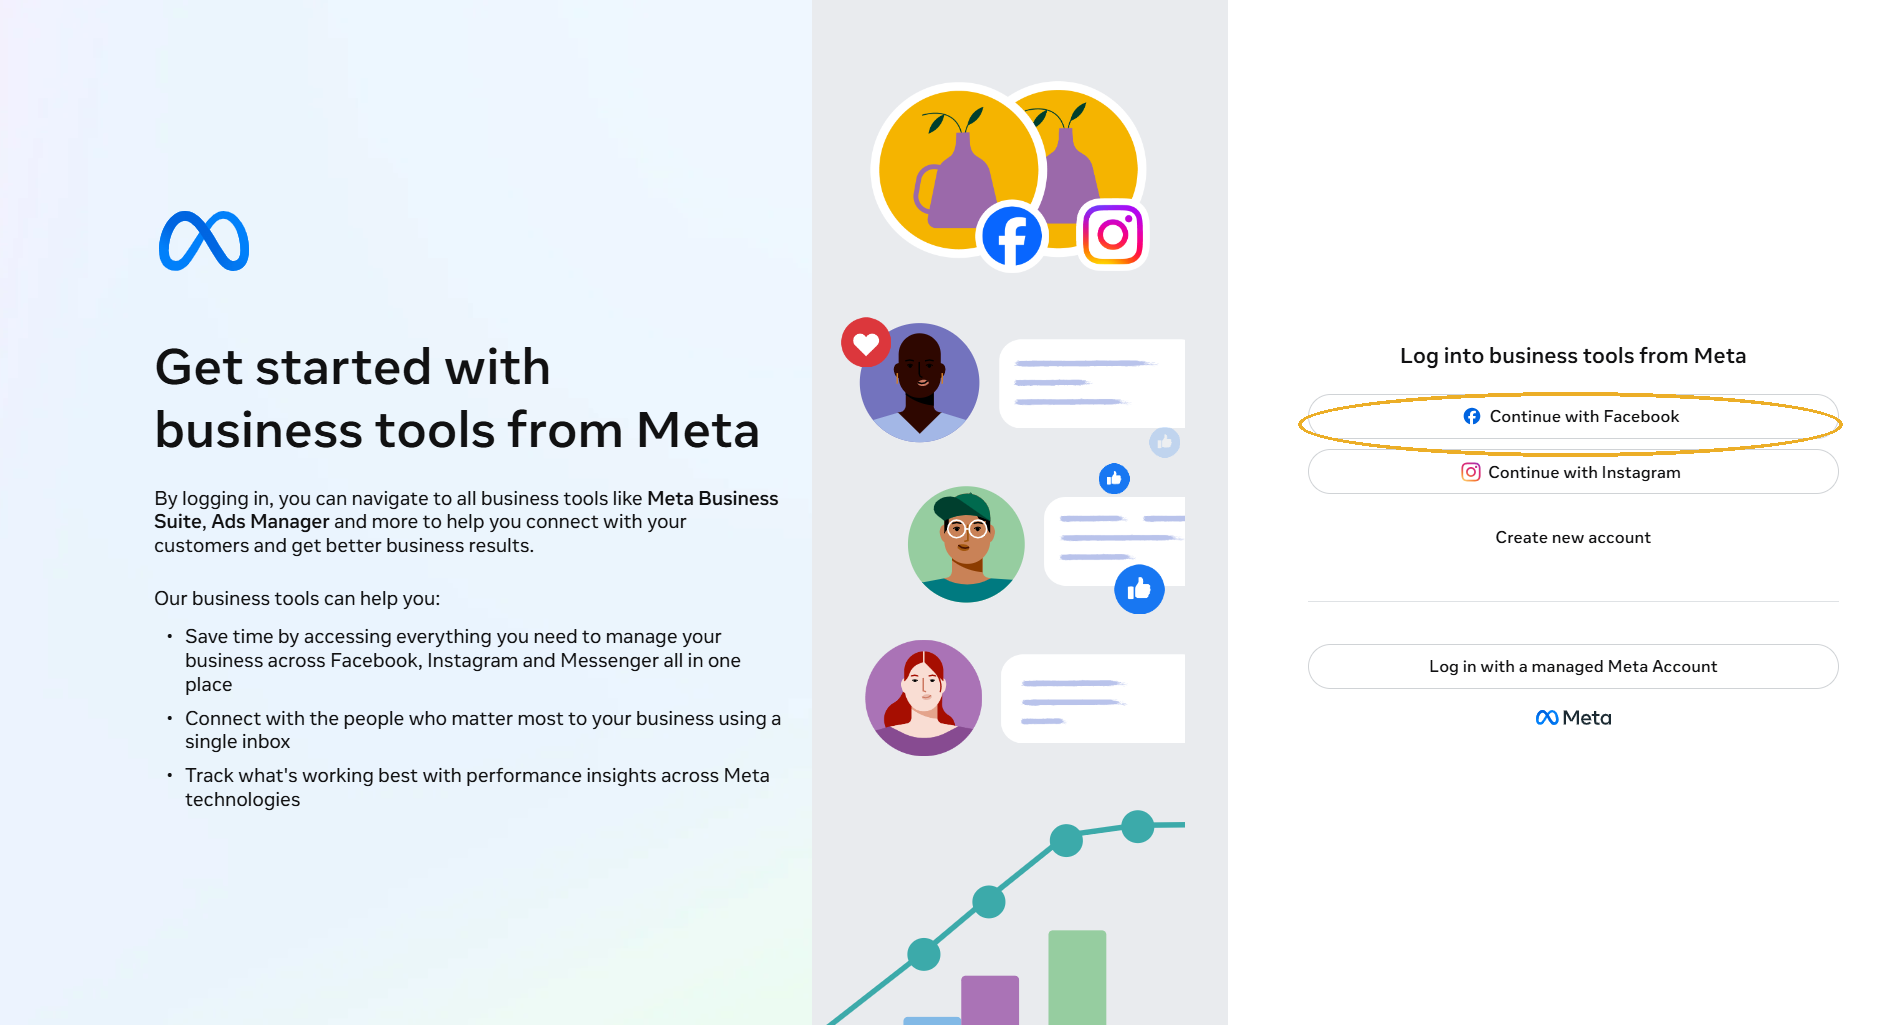
Go to Meta Business and sign in
Go to business.facebook.com and click Continue with Facebook to sign in with your personal Facebook account. That is normal: there is no separate business login, and nobody you give access to can ever see your personal profile. If you do not have a Facebook account at all, create one first.
 Click to enlarge
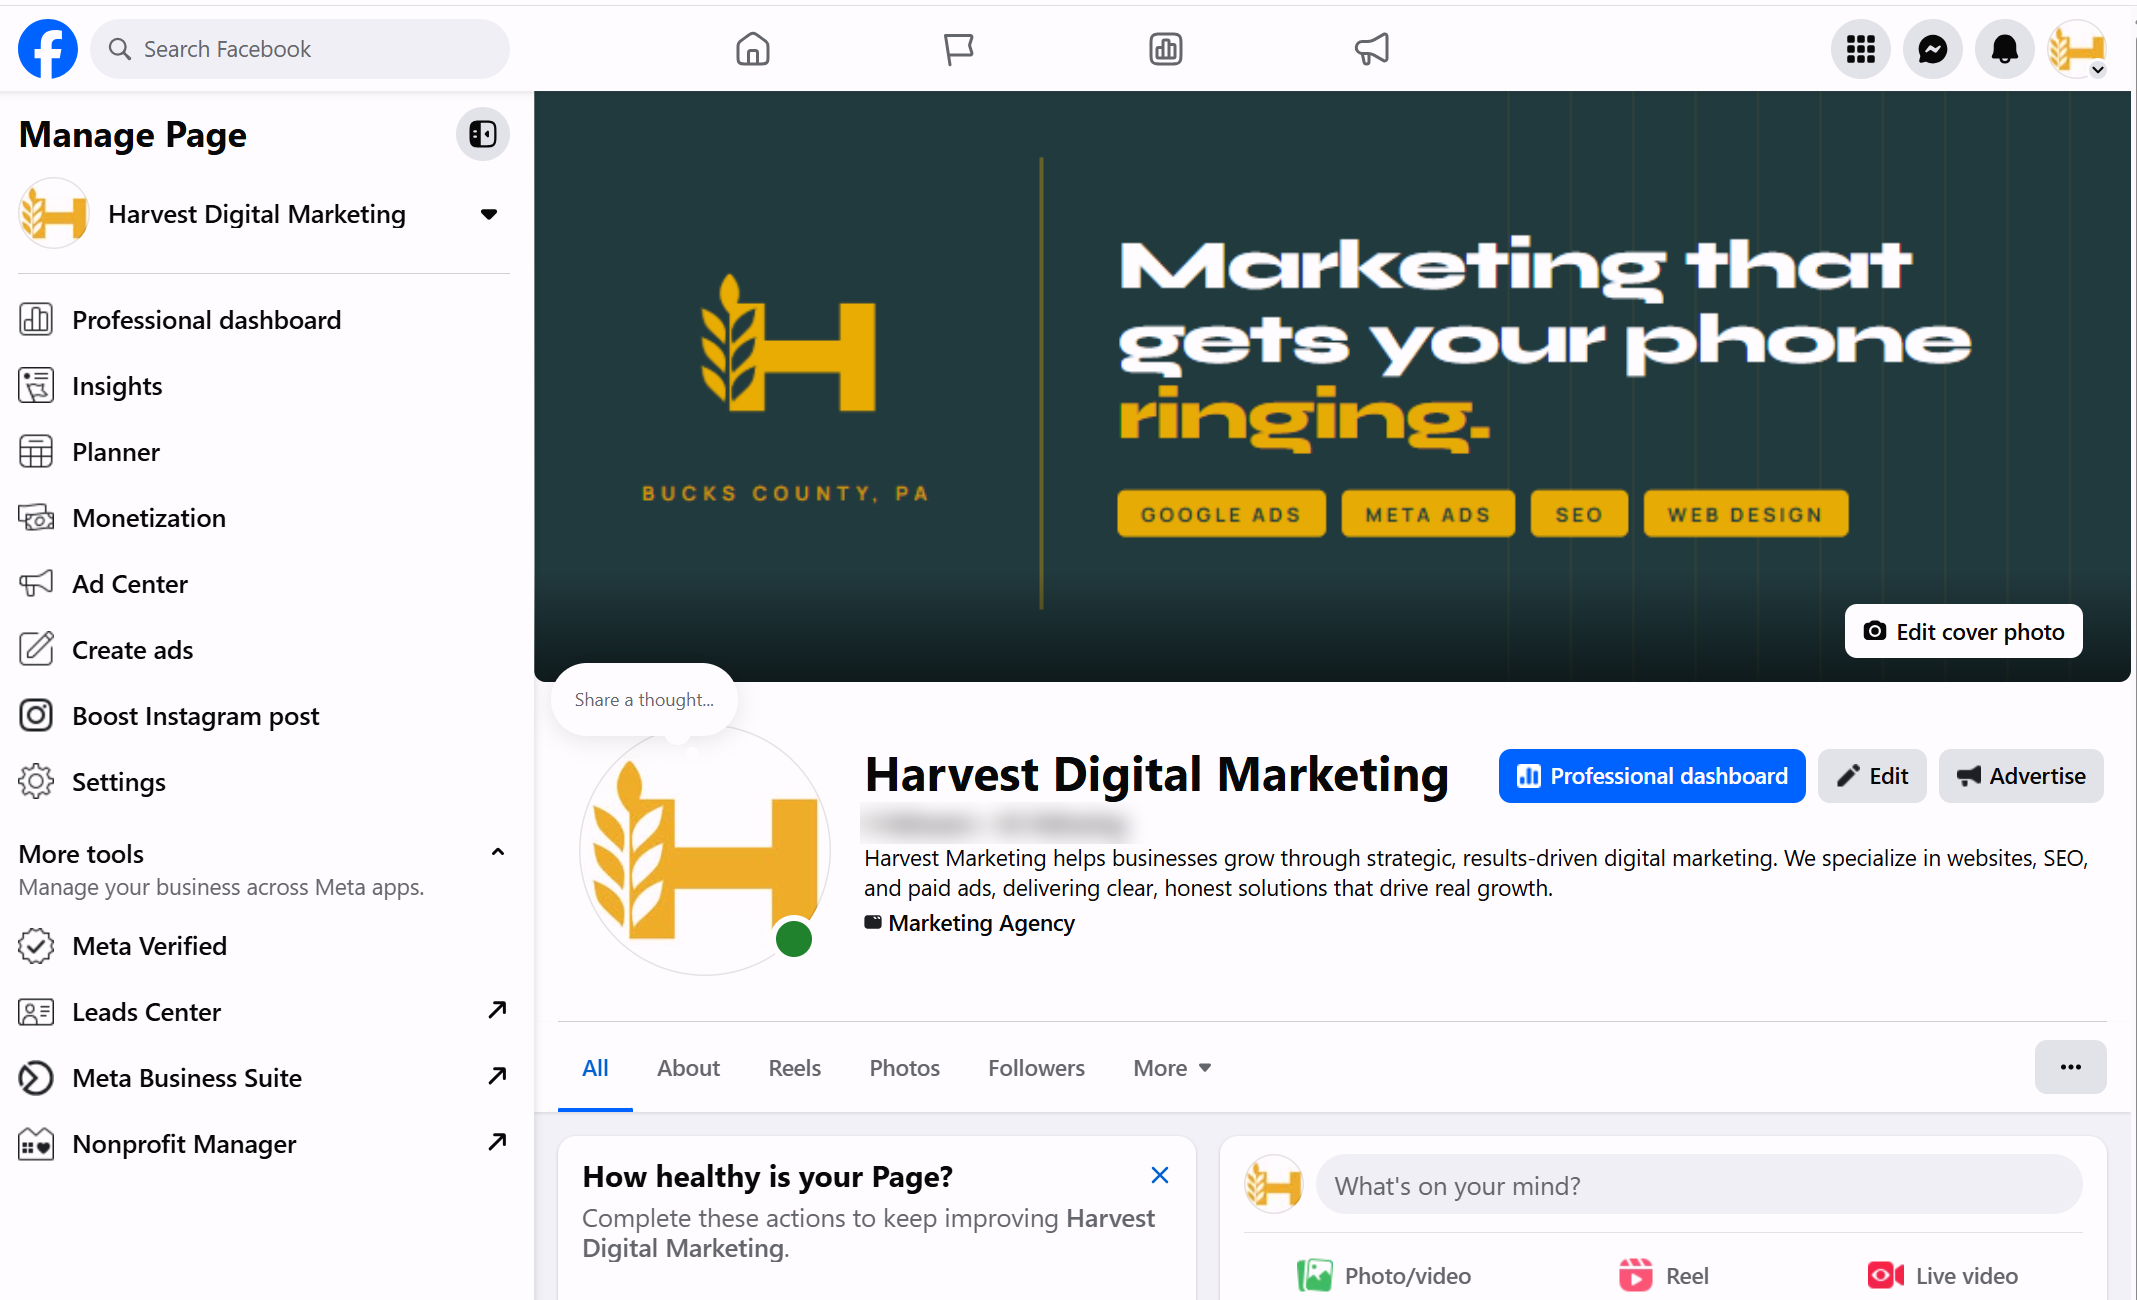
 What does Business Manager show you?
Click the option that matches your screen.
 Click to enlarge
 You have Business Manager. In section 2 below, use the first tab to add whoever you are giving access to as a partner.
Instead of a dashboard, you see a prompt inviting you to create a business portfolio, and no Page or ad account is listed. That means there is no Business Manager under your login yet. Do not set one up.
Do not create a Business Manager or an ad account. Just let me know, and we will set it up in your name so it stays yours.
Once you have read that, use the second tab in section 2 below.
Facebook is the hardest platform to undo. An ad account cannot move between businesses, and its currency and time zone can never change after it is made. Get it wrong and the only fix is a new account with none of your history. That is why we would rather build it than repair it.
Add another user
Two routes, depending on what section 1 told you. Pick the one that matches your screen. If you also need an ad account created, that is the last part, just below.
Add them as a partner
Ask whoever you are giving access to for their partner business ID, a long number from their own settings. It is safe to share and does nothing on its own.
If they have already sent you a request, you can skip all of this. Go to Settings, find Requests, check what it asks for, and approve it.
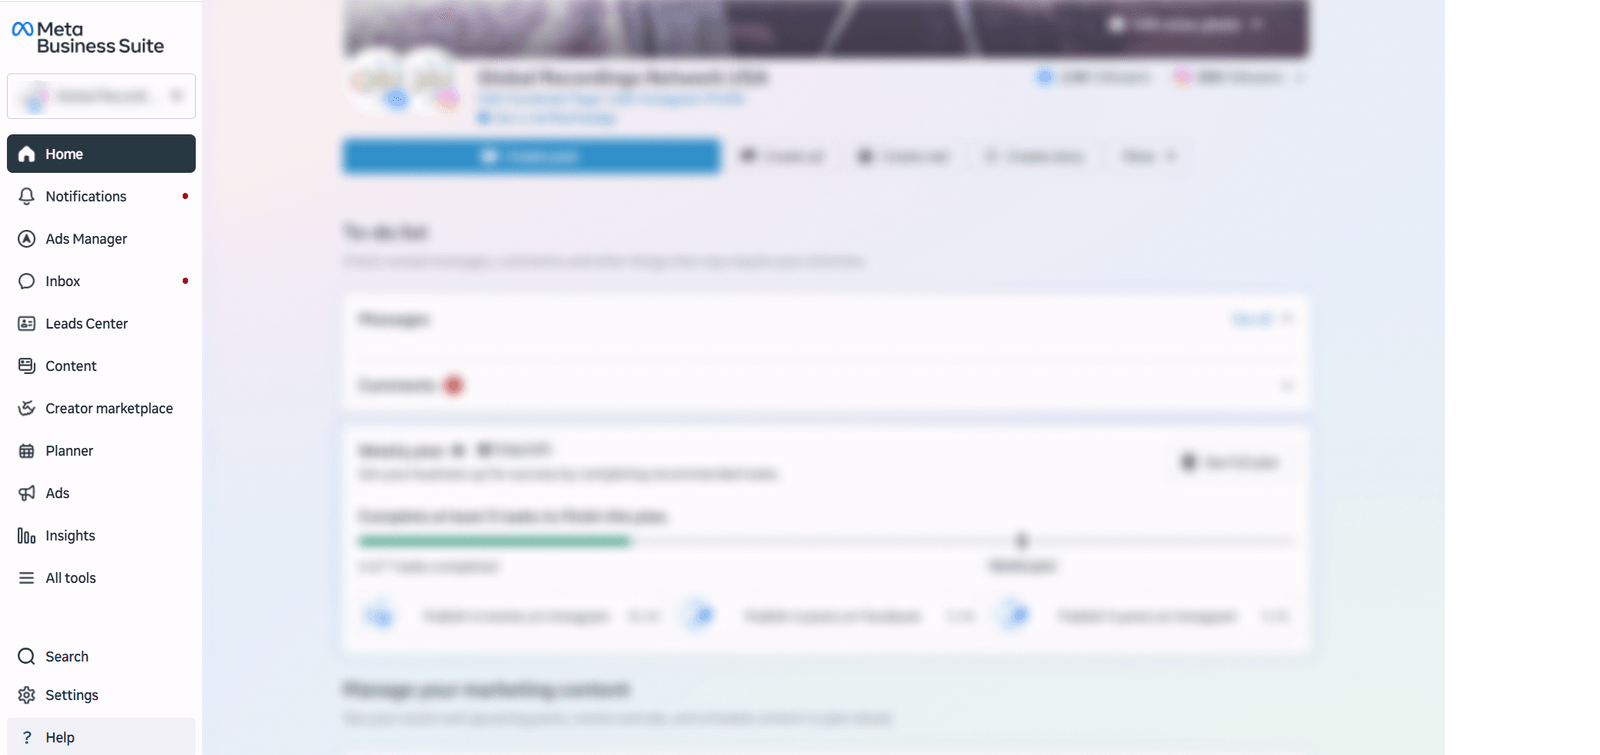
Open Settings in Business Manager
From business.facebook.com, click Settings at the very bottom of the menu down the left. Meta shuffles these menus often. The screen you want lists Users and Partners.
 Click to enlarge
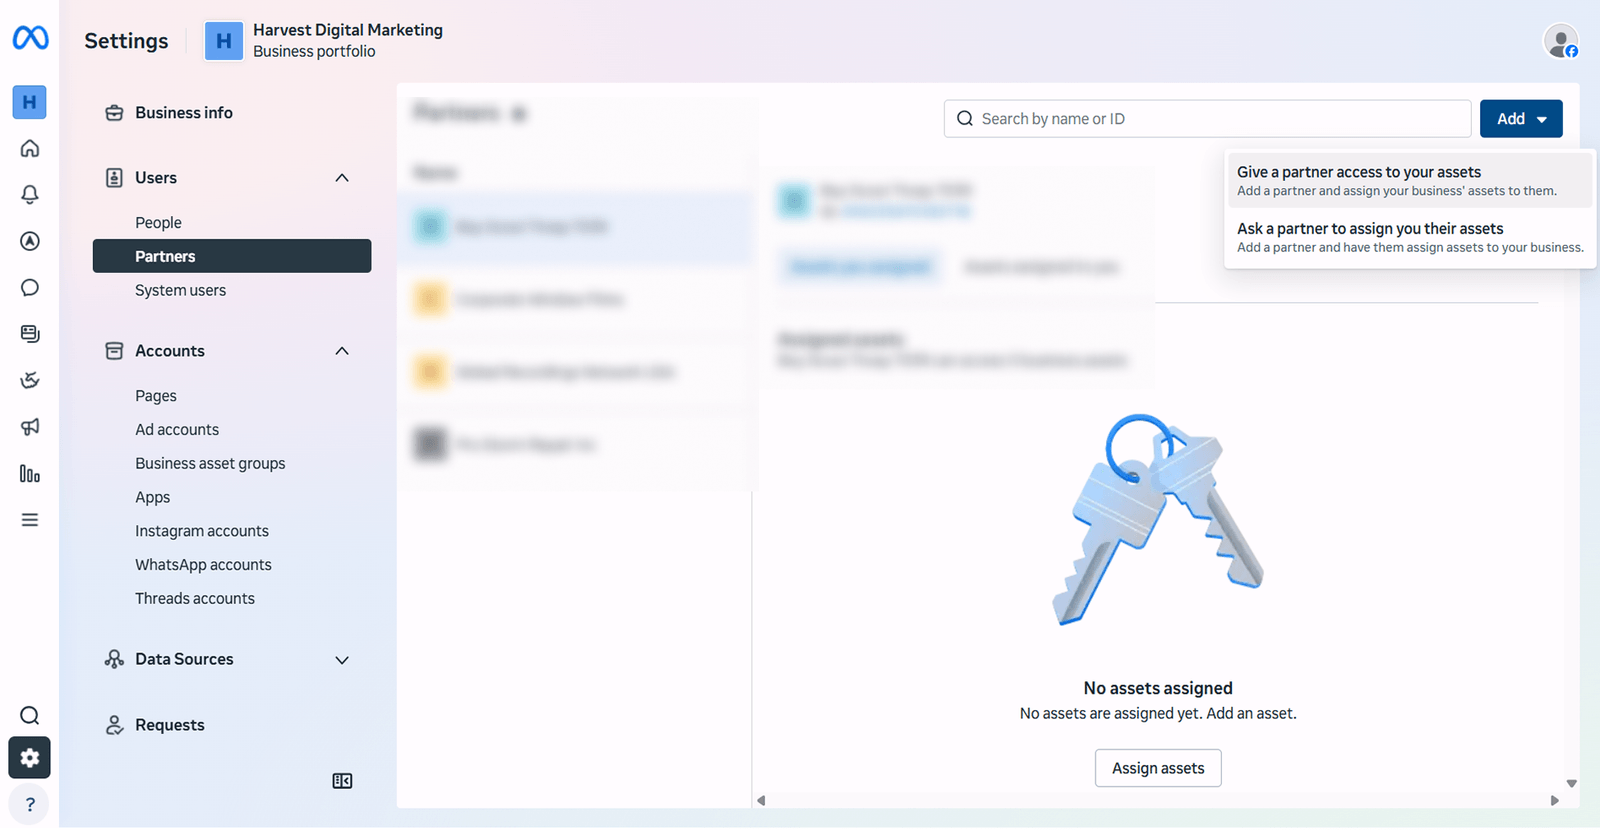
 Open Partners and click Add
Partners sits under the Users heading. Click the blue Add button in the top right, then choose Give a partner access to your assets.
 Click to enlarge
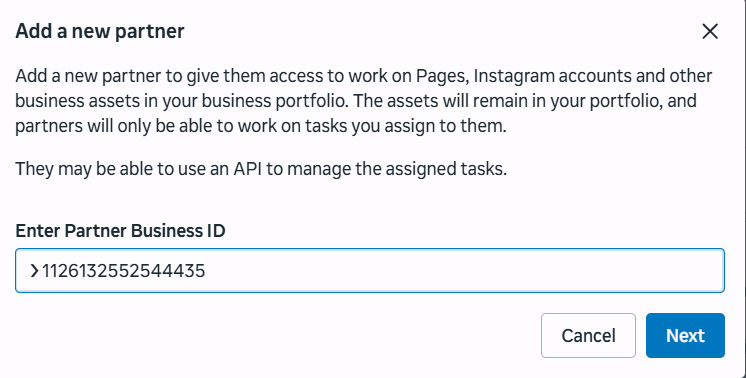
 Paste in the business ID
A box called Add a new partner asks for the number. Paste it in and click Next.
 Click to enlarge
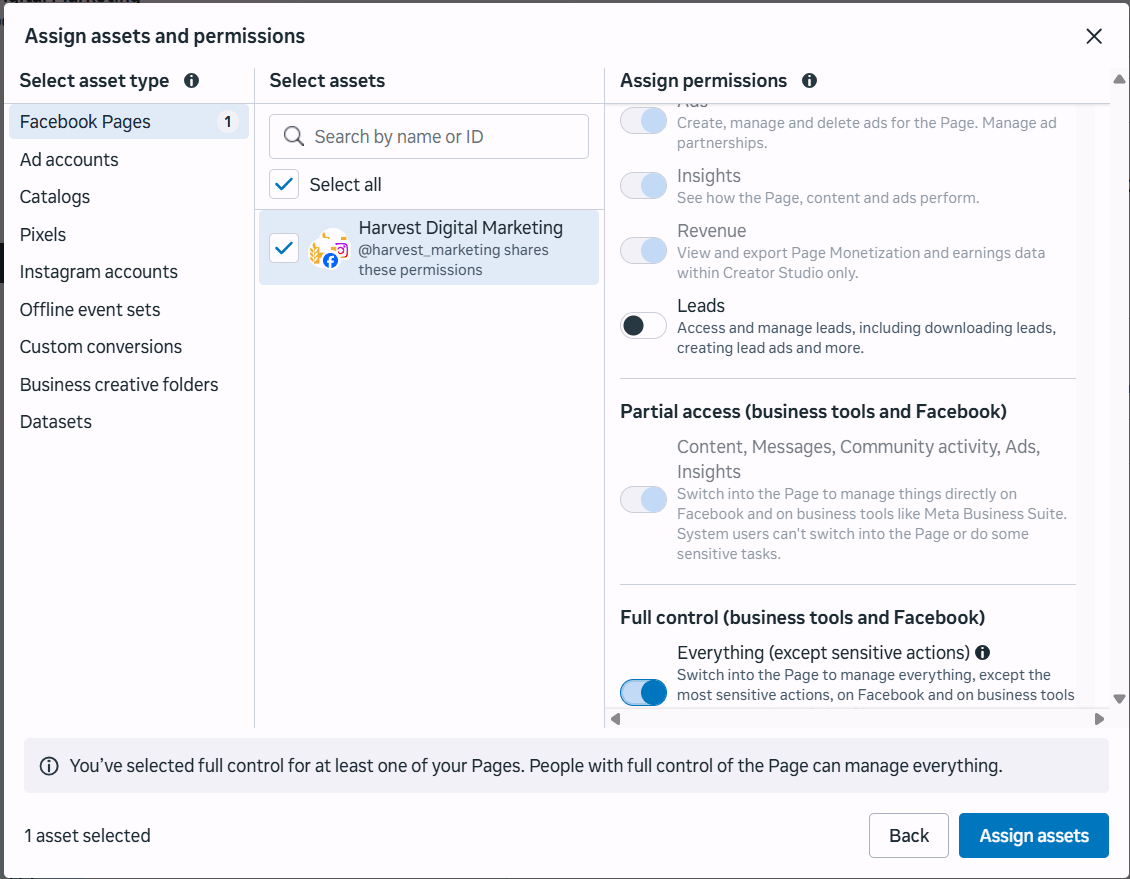
 Share your Page
Click Facebook Pages on the left, tick your Page in the middle, then choose the access level on the right. If they only run ads, task based access is enough. If they will also post and reply to messages, they need fuller Page access.
 Click to enlarge
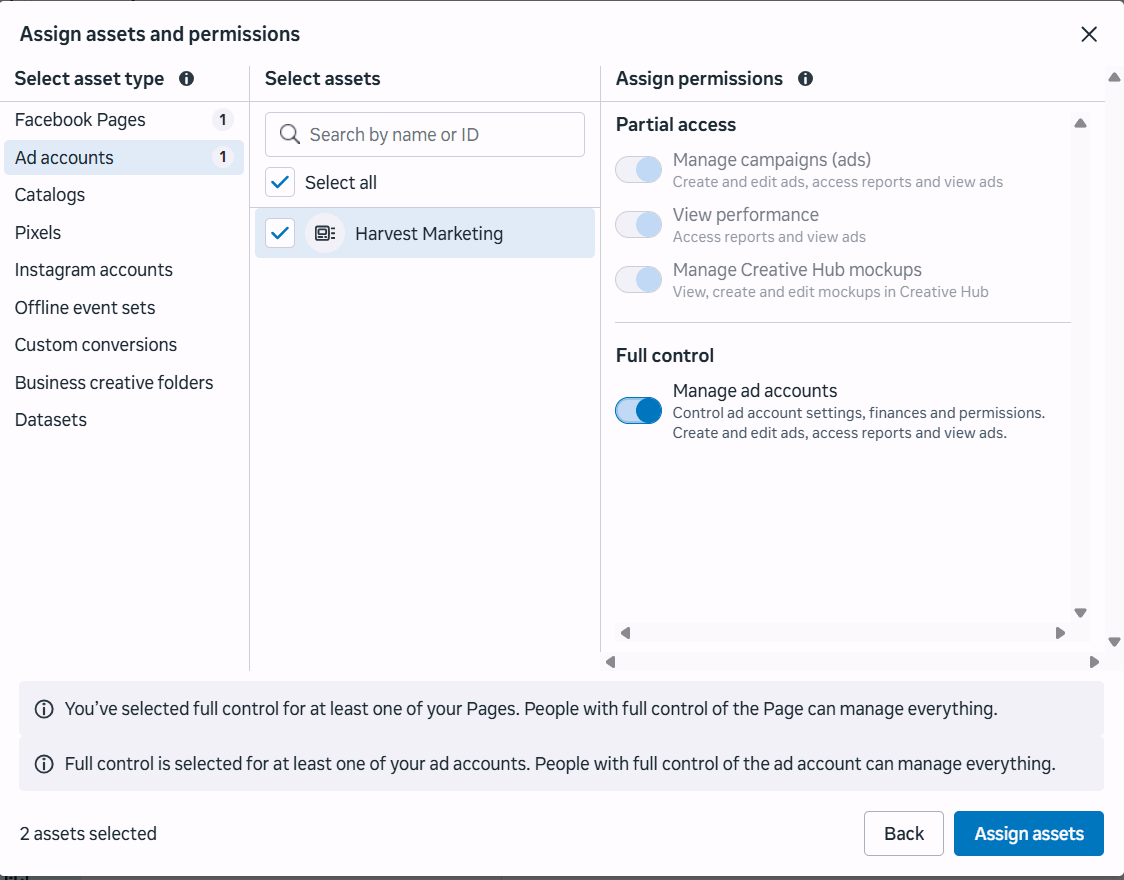
 Share your ad account
Click Ad accounts on the left, tick yours, and switch on Manage ad accounts. Then click Assign assets and you are finished. Your tracking Pixel is something we set up ourselves, so there is nothing else for you to share here.
 Click to enlarge
 Whoever you added appears in the Partners list with your Page and ad account next to their name. Access starts right away, so there is nothing for anyone to accept.
You have a Page but no Business Manager
Where most trades businesses are, and completely normal. Two options.
Open your Facebook Page, copy the address from your browser's bar, and send it to us, telling us you have no Business Manager. We build one in your name, add you as owner, and connect ourselves as a partner. Ten minutes on a screen share, done right the first time.
Rather just share the Page for now? You can. Enough for someone to post and reply, but not to run ads. Ads need Business Manager, no way around it.
Open your Page settings
From facebook.com, switch to your Page, then look for Settings. Meta renames this often, so hunt for anything that says settings or manage.
Find Page access
Look for Page access or Page roles in the settings list. It shows everyone who can manage the Page today and a button to add someone new.
Add them and confirm
Click to add someone with Facebook access, type in their name or email, choose the access level, and confirm. Facebook will ask for your password here to prove it is really you. That is Facebook asking you, which is fine. It is never a person asking.
They show in the Page access list. This route only shares the Page. If ads are part of the plan, you still need Business Manager, so tell us and we sort it.
Do you also need an ad account created?
Most of the time we create this for you. Only do it yourself if you are not working with a marketing company, and even then, slow down: the two settings in step 3 can never be changed.
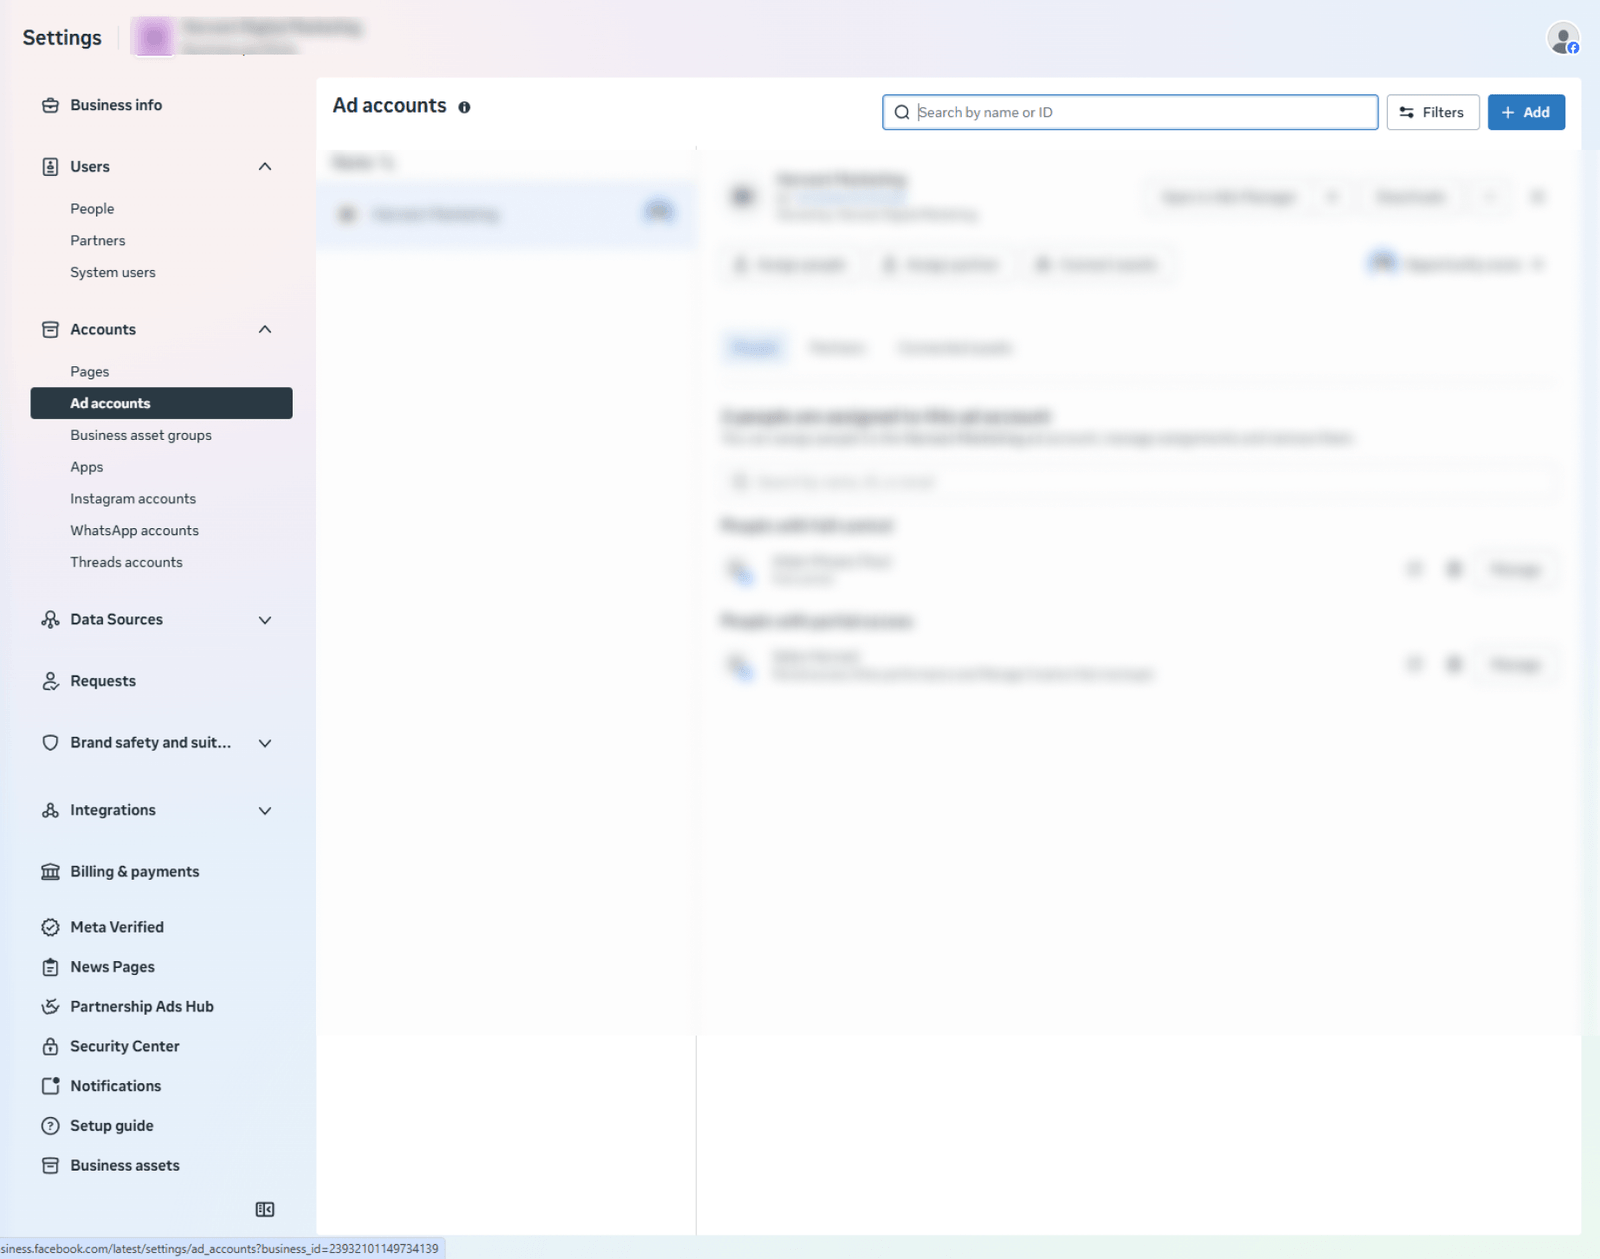
Open Ad accounts and click Add
From business.facebook.com, click Settings at the bottom left. Find the Accounts heading, click Ad accounts, then the blue Add button in the top right.
 Click to enlarge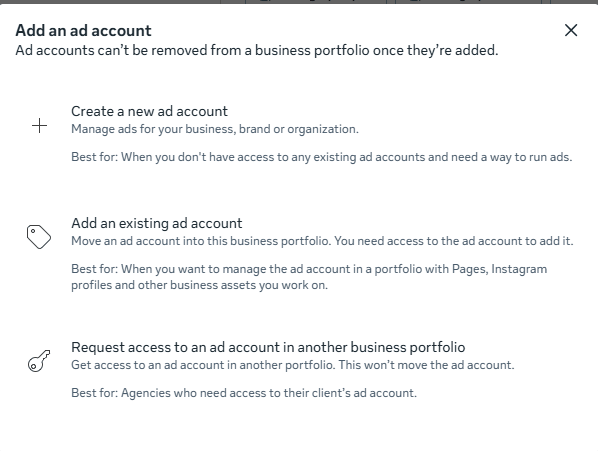
Name it, then set the time zone and currency
Your business name, local time zone, US dollar. Slow down. Currency and time zone can never be changed. Wrong here means every report is in the wrong money or the wrong day, and the only fix is a new account.
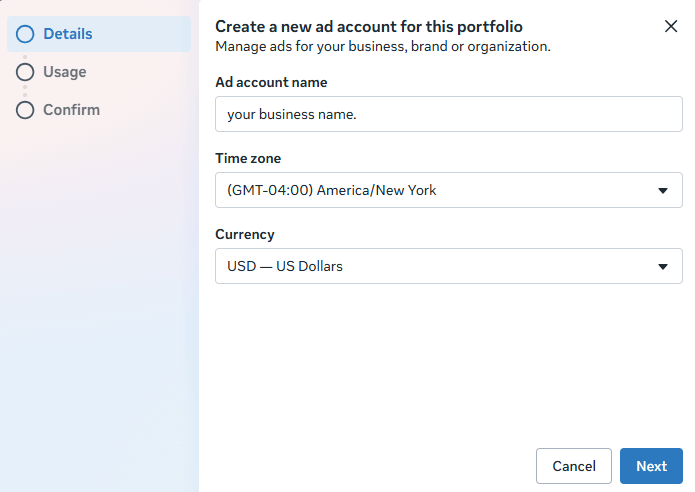 Click to enlarge
 Connect them as you create it
The next screen asks who will use the account. Choose Another business or client and paste in their business ID. Click Next, agree, and create. The account is yours, and they are connected in the same move, so there is no separate sharing step afterwards.
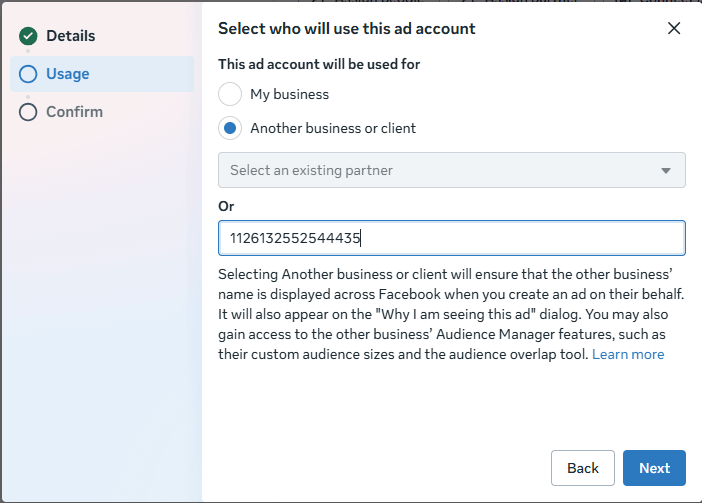 Click to enlarge
 Add your card in Billing and payments
In the left menu, click Billing & payments, then Payment methods. Find your new account and click Add payment method. Enter your card and save.
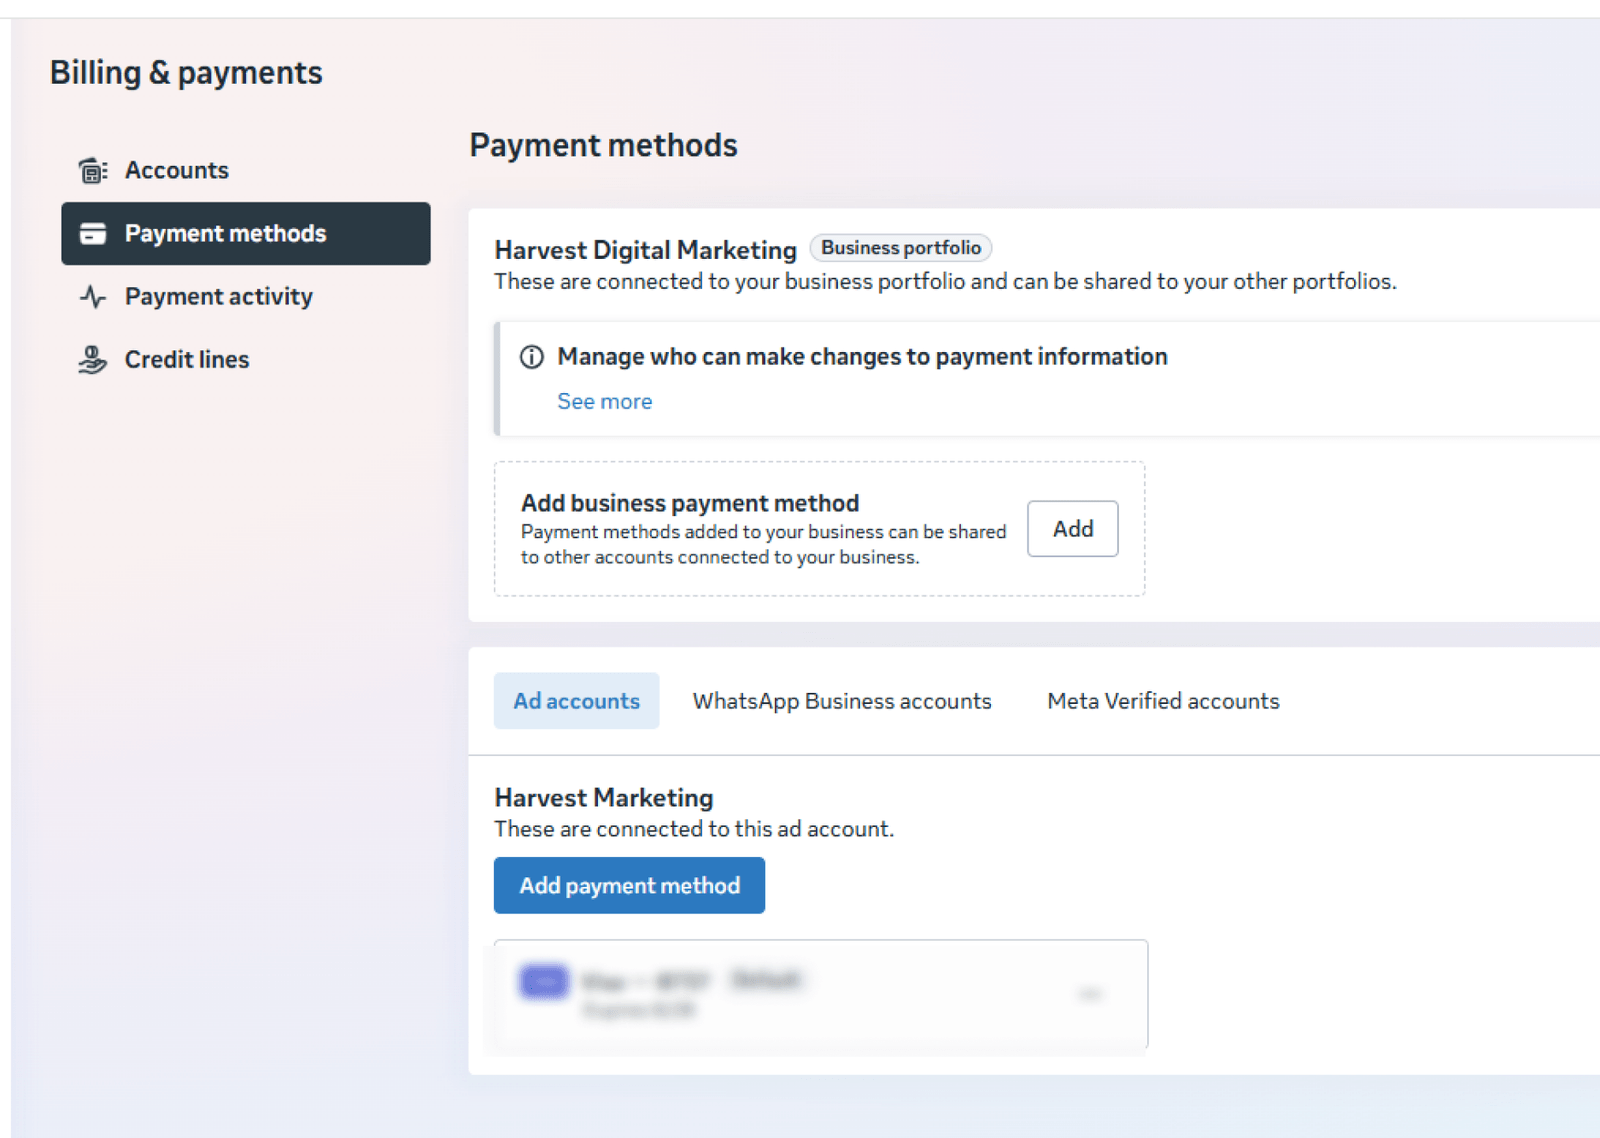 Click to enlarge
 Your card on your own account. Meta charges you directly as ads run, you see every charge, and whoever runs your ads never sees your full card number. We never hold your card and never mark up your ad spend.
What level of access should they get?
For each thing you share, Meta offers task based access and full control. Task based is enough for almost everyone you would give access to: run ads, post, read results. Full control adds changing settings and deleting things, which nobody running your marketing needs. Whatever you grant, you keep the business and the Page. They work inside your house. They do not get the deed.
How to remove them later
Go to business.facebook.com, then Settings, then Partners. Find them and remove them. Everything you own stays with you: the Page, the ad account, and all the history. You do not need their permission, and you do not need a reason.
Never share your personal Facebook password, and never accept "just log in as me" as an arrangement. Partner access exists so nobody needs your login. A company that asks for it is telling you how they handle everything else.
Wondering what someone should do with that access? Here is our approach: Meta ads for the trades, creative first and measured against booked jobs, not likes.
Still stuck? Facebook is the fiddly one, so reach out and we will work through it together on a quick screen share.